Thursday, April 25, 2019

Antique Embroidery Hoop Frame - photo tutorial

Antique Embroidery Hoop Frame


Greetings!

Hi Everyone... This is Isha Pai, today I am here to share a very "easy to make" photo tutorial of this beautiful antique embroidery hoop frame.

The best part of this frame is you can keep changing the photos on it, as the photo is attached to a mini wooden clip.


Let's Begin with Photo tutorial:

Step 1: Firstly, I have attached a canvas sheet with a wooden embroidery hoop. Then after attaching, I have applied Immix black heavy gesso all over and also to the chippies (cogs wheel frame, heart dream catcher with star and branches with birds) separately.

*I have used only the star part of the "heart dream catcher with star" chippie.


Step 2: After drying the gesso with heat tool, I have then textured the background by using wave stencil along with the mixture of sprinkle glitz and white gesso.  Later after drying off the background texture, I have pasted hand torn corrugated sheet randomly and all the chippies (Arabesque background frame) with glue gun.


Step 3: Then again I had applied black gesso all over. Also pasted some metal embellistments along with a wooden clip for holding photos. 

Here comes my favorite part "using of Immix metallic paints". 
(i). First I started with Gunmetal Grey
(ii). then a very little Bronze Moon to give rusty effect
(iii). lastly, my all time favorite Ancient Gold

All the above metallic paints were used, using dry brush technique.


Step 4: Then with the help of a toothbrush I have sprayed  Ancient Gold metallic paint on the sides to give dot effects.


Materials used are:

1. Wooden embroidery hoop

2. Canvas sheet

3. Black heavy Gesso

4. Stencil: Wave

5. Frames: Arbesque Background Frame, Cogs wheel frame,
Heart dream catcher with star, Branches with birds

6. Corrugated sheet

7. Metallic Paints: Ancient Gold
Gunmetal Grey
Bronze Moon

8. Sprinkle Glitz mixed with white gesso

I hope you all have loved this photo tutorial... 
And I am hoping to see your creation of such kind of hoop frame either in my way or your own way using the amazing products from https://www.expressionscraft.in 

Love & Peace from Me to You all...

Happy Crafting & Keep Crafting... 


Tuesday, April 16, 2019

Bundle of Joy

Bundle Of Joy

Greetings!

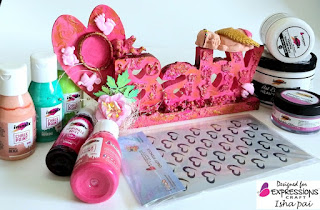
This is Isha Pai and today I am sharing the Video Tutorial of this pink baby frame, made for a new born baby girl, with the amazing materials from https://www.expressionscraft.in/

It has been only a few days now,  since the cute little feet of this new born has touched our mother earth. 

It is said that a daughter is that miracle of God, who fills our lives with sunshine and our hearts with love...

Every house must have a DAUGHTER :)


Video Tutorial for the same is as follows:


Materials used are:


1. Chalk Paints: Sweet Pea, Aqua marine, Cotton Candy and Beige

2. Metallic Paint: Ancient Gold

3. Flower: Botanical Melange

4. Chippie: Heart frame Chippie and spring leaves

5. Sprinkle Glitz

6. Deco stones: mini, medium and mega

7. Gesso: white

8. Stencil: Heart

9. Crackle texture paste

I hope you all have enjoyed and loved this video tutorial...

Kindly shower your love & blessings with a comment and a like :)

Thank you for stopping by... Love You all....


Wednesday, April 10, 2019

Blazing Almanac


BLAZING ALMANAC


Greetings everyone!

Firstly, a very big thank you to Shylaa Shree ji for giving me this honour of Guest DT for the April month Splashy Mix Challenge.

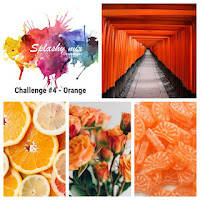
Moodboard for April
 April moodboard Challenge

Here I have made a project according to the new interesting moodboard for the month of April for Splashy Mix Challenge. 


Art Journal Cover Page

Procedure:

Step 1: I had applied Immix Art Essential White Heavy Gesso all over my cover page and on the sides. 


Step 2: Then I applied white gesso to the MDF tags (designed by me), small one inch chipboard tags (6 pcs and pasted burlap cloth over chipboad tags) and even on the other MDF and metal embellishments.


Step 3: After applying white gesso, I arranged the embellishments, tags and also I have arranged my name (ISHA) randomly.

And also, to give grainy texture in background I applied a mixture of Immix Texture paste mixed with Immix Sprinkle Glitz and deco stones, then started with spraying Immix Sprinkle Mist Orange Blaze and after drying it, I started coloring from top left corner with sun kissed gold along with  wedding red metallic paint.


Step 4: Later I colored the MDF sentiment "Sweet little memories" with tuscan red and dusted it with silver embossing powder. And adhered the same in the center.

Finally this is the outcome of my beautiful fiery project using amazing products from https://www.expressionscraft.in/ 


I hope you all have liked and understood the pictorial...

Thanks for stopping by. :)

Kindly drop in some love.... 

Happy Crafting and Keep Creating... :)